BDD for Dynamics 365 CE – Part 2 – Acceptance Testing

Given BDD is user-centered approach to development, it makes sense to start showing you how you can use BDD in the context of user acceptance testing (UAT) . If you are new to BDD, you can read my previous intro post.

What is user acceptance testing?

Essentially any testing you do will eventually be contributing towards making sure that the system is accepted by users in the sense that it meets user requirements. However in most cases the users will be interacting with Dynamics 365 CE UI and they expect the UI to provide the features they need. So in this post I will focus on how we can use BDD to ensure the application will deliver the expected user experience.

What tool do you need?

I will be using the popular SpecFlow framework. This will allow you to define our requirements and drive automated testing.

I will also be using EasyRepro framework. This will allow you to interact with the CRM UI as part of automated testing.

If you are new to EasyRepro and UI Automation, you can read my previous posts on this.

How do you document the requirements?

In SpecFlow you document the requirements in Gherkin language using feature files that contain scenarios. Each feature can have multiple scenarios. Think of these specifications are your acceptance criteria for your user stories.

Most likely you will first have high level discussions with your users around what they need, as you get to details and have grooming sessions with your team, you will arrive at the BDD requirement specification. This is the agreed scenario that the system is expected to provide.


Feature: Introductory phone call

In order to provide excellent customer service
As a customer service
I want to arrange a follow up phone call with new customers

Scenario: Follow Up Phonecall on Account Creation

Given I login to CRM
When I navigate to Sales and select Accounts
Then I click on New command
And I set value of name to RandomString of 8
And I set value of telephone1 to '123456789'
And I set value of websiteurl to 'http://dynamics.microsoft.com'
Then I click on Save command
When I go to social pane and select Activities
Then Activity timeline count should be equal to 1

How do you ensure requirements are met?

Firstly as you can see from the above, the specification can be easily understood by the business user and it is specific enough for developer and testers to implement and verify. The chance for different team members to have a different understanding is very low.

Secondly you can take this to the next level by linking your specification to automated tests.

How do you link scenarios to tests?

Luckily SpecFlow does most of the hard work for you. Essentially every statement in the scenario has an equivalent piece of code that executes as the test automation framework runs through the scenario. Let’s take a look at a few examples.

Given I login to CRM

The first line in the scenario will basically translate into the below method that will open a new instance of the browser pointing to CRM.

        [Given(@"I login to CRM")]
        public void GivenILoginToCRM()
        {
            string url = Environment.GetEnvironmentVariable("CrmUrl", EnvironmentVariableTarget.User);
            string user = Environment.GetEnvironmentVariable("CrmUsername", EnvironmentVariableTarget.User);
            string pass = Environment.GetEnvironmentVariable("CrmPassword", EnvironmentVariableTarget.User);

            xrmBrowser = new XrmBrowser(options);
            xrmBrowser.LoginPage.Login(new Uri(url), user.ToSecureString(), pass.ToSecureString());
            xrmBrowser.GuidedHelp.CloseGuidedHelp();

            xrmBrowser.ThinkTime(500);
        }

Let’s take a look at another scenario line.

Then I click on New command

In the second case we have added the parameter ‘command’ to the method. When this scenario line executes, it will pass ‘New’ to the method.

This is great because you only need to write the code for the click command once and you can re-use this in many scenarios. Eventually you will have handlers for most of the user actions. So creating automated tests will not take very long.

        [Then(@"I click on (.*) command")]
        public void WhenIClickCommand(string command)
        {
            xrmBrowser.CommandBar.ClickCommand(command);
            xrmBrowser.ThinkTime(1000);
        }

You can take a look at the full implementation of this scenario on GitHub.

What have we observed?

  1. We can use Gherkin/SpecFlow to clearly define requirements using specification that can understand by all team members
  2. We can use SpecFlow/EasyRepro to link specification to automated tests
  3. Once grammar and implementation are created for a specific action, this can be re-used in other scenarios
  4. Using BDD we can ensure the system will meet the user requirements

Note this particular scenario that I can described can be useful to define smoke or regression packs that can be run as part of automated build/deployment to ensure your high level acceptance tests are regularly tested and working.
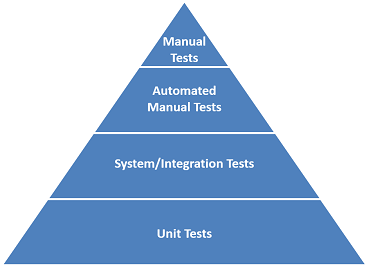
Whats next?

In the next post I will show you how you can apply BDD to other types of tests.

UI Automation for Dynamics 365 CE – EasyRepro (Part 2)

In this post I will cover how to get started using EasyRepro framework for Dynamics 365 CE. If you are new to UI Automation, take a look at my previous Introduction post.

Note the framework consists of a single solution that contains a sample project. If you just want to take a look and get an idea, you can download the source code from the GitHub project and take a look at the sample test project.

Unless you want to contribute to the framework or debug the framework code you are more likely to just consume the framework libraries and focus on building your tests. This is the scenario I will cover in this post.

Scenario

Login to CRM
Navigate to Sales/Contacts/Active Contacts
Create a new Contact
Save

Create a Unit Test project

You can use any unit testing framework you like. I will use MSTest. For this just add a new unit testing project to your solution as per below. Note you need to select .NET 4.7 as the Nuget packages doesn’t seem to install correctly with lower versions.

UIAutomationProject

Add the required NuGet packages

Add the EasyRepro library from the Nuget Gallery . Not sure if this published by MS. As an alternative you can compile the sample project from GitHub and add the Microsoft.Dynamics365.UIAutomation.Api and Microsoft.Dynamics365.UIAutomation.Browser DLLs as a reference).

EasyReproNuget

Below are all the package syou need along with the versions.

<?xml version="1.0" encoding="utf-8"?>
<packages>
  <package id="Dynamics365.UIAutomation.Api" version="9.0.0" targetFramework="net47" />
  <package id="MSTest.TestAdapter" version="1.1.18" targetFramework="net461" />
  <package id="MSTest.TestFramework" version="1.1.18" targetFramework="net461" />
  <package id="Newtonsoft.Json" version="10.0.3" targetFramework="net47" />
  <package id="Selenium.Chrome.WebDriver" version="2.31" targetFramework="net47" />
  <package id="Selenium.Support" version="3.5.1" targetFramework="net47" />
  <package id="Selenium.WebDriver" version="3.5.1" targetFramework="net47" />
  <package id="System.Diagnostics.DiagnosticSource" version="4.4.1" targetFramework="net47" />
</packages><span 				data-mce-type="bookmark" 				id="mce_SELREST_start" 				data-mce-style="overflow:hidden;line-height:0" 				style="overflow:hidden;line-height:0" 			></span>

Add a Test

As a standard unit test to your project.
CreateContactTest

First you will need your CRM URL, Username and Password. Below I am retrieving these from Environment variables as I didn’t want to check-in credentials to into source control. You can use configuration files. I strongly recommend that credentials are encrypted and securely stored.

        private readonly SecureString _username = Environment.GetEnvironmentVariable("CRMUser", EnvironmentVariableTarget.User).ToSecureString();
        private readonly SecureString _password = Environment.GetEnvironmentVariable("CRMPassword", EnvironmentVariableTarget.User).ToSecureString();
        private readonly Uri _xrmUri = new Uri(Environment.GetEnvironmentVariable("CRMUrl", EnvironmentVariableTarget.User));

Next you will need to define your browser requirements. In this instance I will use Chrome in Private (Incognito mode).

        private readonly BrowserOptions _options = new BrowserOptions
        {
            BrowserType = BrowserType.Chrome,
            PrivateMode = true,
            FireEvents = true
        };

The first step is normally to open a new browser instance and login to CRM. As you can see the below API make this very simple to achieve.

            using (var xrmBrowser = new XrmBrowser(_options))
            {
                xrmBrowser.LoginPage.Login(_xrmUri, _username, _password);
                xrmBrowser.GuidedHelp.CloseGuidedHelp();

Once CRM is open. You can interact with CRM page using the XrmBrowser object. As you can see below, there are different components for Navigation, Grids and CommandBar. Note you will need to add some think time between different calls to allow the browser to do its work.


                xrmBrowser.Navigation.OpenSubArea("Sales", "Contacts");

                xrmBrowser.ThinkTime(2000);
                xrmBrowser.Grid.SwitchView("Active Contacts");

                xrmBrowser.ThinkTime(1000);
                xrmBrowser.CommandBar.ClickCommand("New");

                xrmBrowser.ThinkTime(5000);

Once you are on the new contact page, you can interact with the CRM entity form through the Entity component. This allows you to set values on the form. This can be simple texts fields or even composite controls and lookups.

                var fields = new List<Field>
                {
                    new Field() {Id = "firstname", Value = "Wael"},
                    new Field() {Id = "lastname", Value = "Test"}
                };
                xrmBrowser.Entity.SetValue(new CompositeControl() { Id = "fullname", Fields = fields });
                xrmBrowser.Entity.SetValue("emailaddress1", "test@contoso.com");
                xrmBrowser.Entity.SetValue("mobilephone", "555-555-5555");
                xrmBrowser.Entity.SetValue("birthdate", DateTime.Parse("11/1/1980"));
                xrmBrowser.Entity.SetValue(new OptionSet { Name = "preferredcontactmethodcode", Value = "Email" });

Now you can save the form.

                xrmBrowser.CommandBar.ClickCommand("Save");
                xrmBrowser.ThinkTime(5000);

Finally I will take a screen shot. You can take these at any point in time during the test or if the test fails. This can be used as test evidence, troubleshooting failed tests or for spot checks.

                string screenShot = string.Format("{0}\\CreateNewContact.jpeg", TestContext.TestResultsDirectory);
                xrmBrowser.TakeWindowScreenShot(screenShot, ScreenshotImageFormat.Jpeg);
                TestContext.AddResultFile(screenShot);

Run the Test

If you run the test now the browser should navigate to CRM and perform the actions described in the scenario. You will normally add some verification at the end of the test to ensure the expected outcome was achieved and fail the test otherwise.

CreateContactTestResults
CreateContactScreenShot

You can find this code including any future updates on GitHub

As you can see it very easy to setup an automated UI test using EasyRepro. In the following posts I will cover more advanced topics on UI Automation.

UI Automation for Dynamics 365 CE – Introduction (Part 1)

This post is an introduction to UI Automation Testing for Dynamics 365 CE. I will cover the basic concepts. The next post will show how to get started and provide a practical example.

What is UI Automation?

As the name suggests, UI Automation is the automated testing that happens at the UI layer. Where as unit and integration tests interact with assemblies and APIs, UI tests interact with the actual application UI.

What is involved?

Typically the automated test will open the application UI which in our case is the Dynamics 365 CE web interface and then execute a series of scenarios as if it was the actual user performing the actions.

How does it work?

UI Automation tests typically use frameworks that have the ability to create an instance of a browser. Frameworks also provide APIs or drivers/adaptors that provide you with the ability to interact with the browser instance to perform actions such as navigating to page, filling out forms and clicking on UI elements. Selenium is one of the most widely used frameworks for testing web applications. You can find out more on the Selenium home page.

What framework should you use for Dynamics 365 CE?

There are many UI automation frameworks out there. If you already have a framework being used in your organisation for other web applications there is a good chance it might work well with Dynamics too. For this series I will be using EasyRepro. This is an open source Framework based on Selenium that was released by Microsoft early in 2017 and has recently been updated to support V9. Take look at the GitHub project for more information on the Framework.

What else you need to know about EasyRepro?

  • Tests are created using .NET, something most CRM developers are already familiar with which can help with adoption and ensure testing practices as part of your development life cycle.
  • It provides you with XrmBrowser object which is a POM (Page Object Model) abstraction on top of the CRM Page. So it gives you API for some of the mostly used actions by the user such as logging in to CRM, interacting with forms and navigation.
  • Future updates may include the ability generate code by recording actions or using IDE.
  • The framework is easy to use and samples on the GitHub project give you a quick start.

What tests you should be automating?

Before you get going with writing tests I would strongly recommend that you think carefully about what tests it makes sense to automate at UI layer. For this the test pyramid always comes handy.

TestPyramid

UI Tests provide very good coverage as they cover the UI and all the layers below such as integrations and any plug-ins you may have. However note the below:

  • UI tests take long to run
  • UI tests normally run less frequently and are further up in your DevOps pipeline.
  • UI tests take longer to develop and maintain

You should have a good number of units tests and integration tests which should provide good coverage for your components and integrations. You can use UI tests to cover UI level features that are not possible to test using Unit and Integration Tests. UI tests can also be used to perform high level smoke testing of your functionality or regression packs. Try to write UI tests once the functionality gets more stable to avoid changes these frequently.

Whats next?

In the next post I will show you how to get started and provide you with a practical examples.